
The world is transforming into a digital space powered by emerging technologies such as SMAC (i.e. a combination of social networking, mobile computing, analytics and cloud computing). These technologies act as the force that helps drive business innovation. So, if your enterprise IT team still do not have a roadmap ready for the emerging mobile computing, cloud computing, and other technologies, then you may experience your company drifting off-course from its goals.
Furthermore, the technology trend introduces many challenges that require you to make significant changes in the way enterprise IT team operates and run their business. Luckily, a new generation of application programming interfaces called as RESTful (i.e. Representational State Transfer) API’s are emerging as solutions that are aimed at managing the social, mobile, analytics and cloud computing trends.
The RESTful API’s help provide enterprises with mechanisms that enable them to engage with SMAC in a well-ordered and efficient manner. In this post, however, we’ll be sharing insight about how RESTful API can be utilized effectively to create mobile solutions. But, to get answers to such question we need first to understand what exactly is a RESTful API. Also, we need to be familiar with the way API is designed and developed to provide mobility solutions.
Overview of RESTful API
A RESTful API is a web service that is implemented using the principles of REST and HTTP. In short, adhering to the REST constraints (such as client-server, cacheable and stateless) are referred to as RESTful. Conforming with these constraints makes it possible for a distributed system to have properties like simplicity, scalability, performance, and much more.
REST (short for Representational State Transfer) is, basically, a style of web architecture that is mainly used for developing web services ideally for enterprise apps. The REST approach is used as an alternative to the heavyweight web services called SOAP (Simple Object Access Protocol).
Many enterprise IT groups seems to be increasingly adopting RESTful APIs, as it enables developers’ to create modular capabilities just using the lightweight interfaces.
How Can You Design and Develop RESTful API?
[su_row][su_column size=”1/2″]Any mobile application that is built on operating systems such as Android, iOS, and others can be used for accessing the RESTful API. Besides, the API parses JavaScript Object Notation (JSON) instead of an overly complex XML format, which helps make building performant solutions relatively faster and easier on a mobile device.The RESTful API could be built with the assistance of Spring MVC or Jersey JAX-RS library or any platform – that utilizes Java annotations which help define resource mapping in an easy and a very declarative manner. Also, popular scripting languages like Perl and others could be used for developing RESTful API.[/su_column] [su_column size=”1/2″]
Developing an iOS Mobile App Using the REST API
In this part, we’ll be talking about the essential steps you must follow for creating a mobile application that will fetch data from the server via the API.
Step 1 – Start with creating a new project in Xcode latest 6.3.1 version.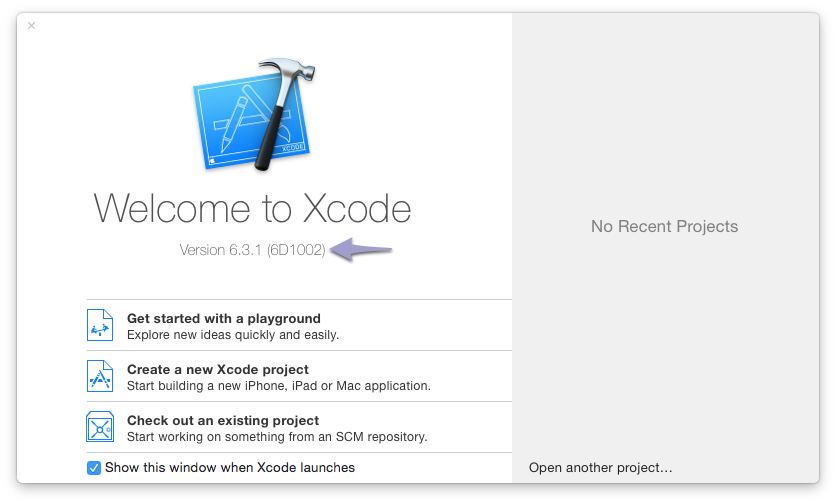
Step 2 – Next, for creating your new project navigate to File → New → Project → iOS Application > Single View Application as shown in the image as follows: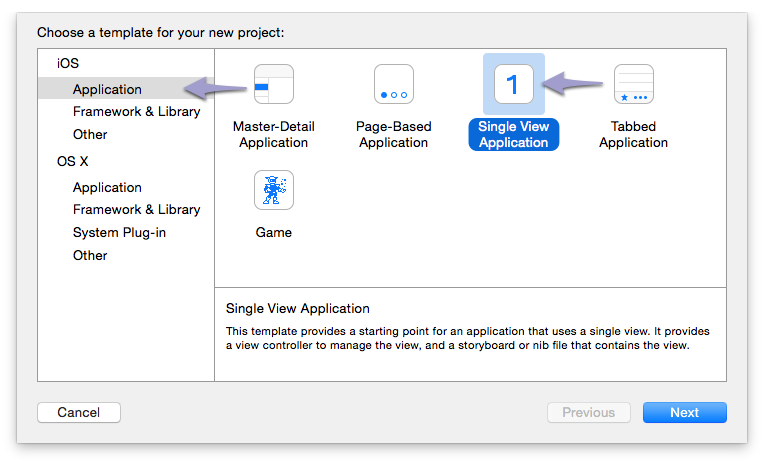
Step 3 – In the next window fill out details such as:
Product Name: Demo
Organization Name (this is optional): ABC
Company Identifier: com.yourcompanyname
Language: Objective-C
Devices: iPhone
Once you’ve entered information as shown above, just select any location where you would like to save your project. And then, press the “Create” button. So, we’ll be working on the files stored in between the “Demo” folder.
Step 4 – The project by default contains a View Controller. However, in our case, we would be showing data that is retrieved using the REST API in the form of a list. For this, we need to use a Table View Controller rather than the default View Controller. Followed by this, we’ll create an entirely new set of files written in Objective-C (which is accessible via File → New → File → iOS Source → Cocoa Touch Class):
Class: TableViewController
Subclass of: UITableViewController
Step 5 – Now save your files within the newly created ‘demo’ folder.
Step 6 – Open up Mainstoryboard.storyboard, and then navigate to the Object library. From there drag the “Table View Controller” object and drop it to the storyboard.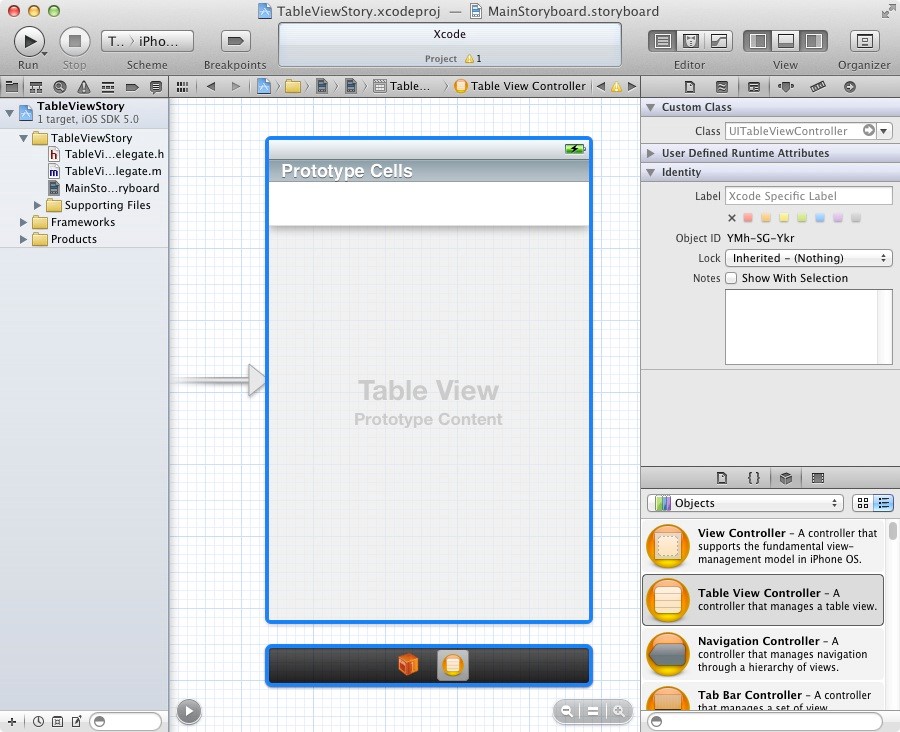
Step 7 – Next, we have to select the default “View Controller” and then delete it. For this purpose, you need to ensure that checkbox in the Inspector is ticked for the “Initial View Controller” option for the selected Table View Controller.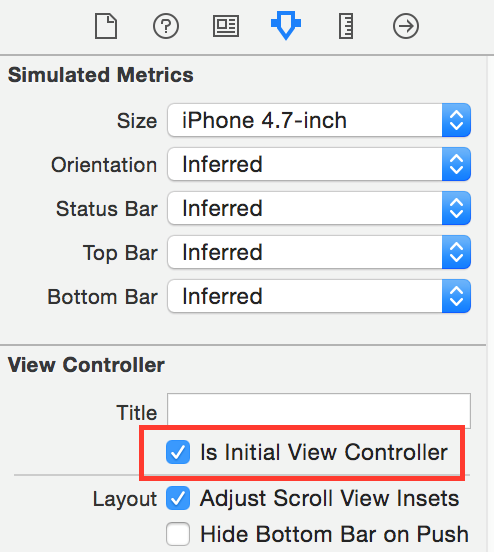
Here are certain things you need to do in the Mainstoryboard.storyboard:
To open up the Table View Cell, just expand the Table View Controller. Now, in the Table View cell window on the left-hand side, enter DemoCell as the Identifier in the Attributes Inspector. This will help in linking the Interface Builder cells in the storyboard to the code.
Make sure to change the basic style to subtitle to get the ability to show the value set by cell.detailTextLabel.
And finally, from under the Table View Controller Scene, only select Table View Controller. Now press the Identity Inspector option and fill the value of TableViewController into Custom Class. This will link your entire scene to the TableViewController.m file.
 [/su_column] [su_column size=”1/3″]
 [/su_column] [su_column size=”1/3″]
 [/su_column][/su_row]
#warning Potentially incomplete method implementation.
// Return the number of sections.
return 1;
}
#warning method implementation is incomplete.
// Return the number of rows. I currently have four rows we would like to show
return 4;
}
UITableViewCell *cell = [tableView dequeueReusableCellWithIdentifier:@”DemoCell” forIndexPath:indexPath];
//temporary data to show the structure of a NSDictionary contained in an NSArray, which is the general structure of a JSON, this can be removed in a later stage
@{@”employee_name”: @”Shikha”, @”created”: @”2016-02-18T09:30:01.639Z”},
@{@”employee_name”: @”Apoorva”, @”created”: @”2016-02-18T09:30:01.639Z”},
@{@”employee_name”: @”Pooja”, @”created”: @”2016-02-18T09:30:01.639Z”}
];
cell = [[UITableViewCell alloc] initWithStyle:UITableViewCellStyleDefault reuseIdentifier:@”DemoCell”];
}
[cell.textLabel setText:[[demos objectAtIndex:indexPath.row] objectForKey:@”employee_name”] ];
[cell.detailTextLabel setText:[[demos objectAtIndex:indexPath.row] objectForKey:@”created”]];
return cell;
}
Make sure to test the app, by selecting on Product → Run.
Next, we need to access JSON using the REST API. For this, use the following code:
@property (strong) NSArray *demoJson;
@end@implementation TableViewController
@synthesize demoJson;
//Make use of NSMutableString to append or replace parts of the URI with query parameters in the future
NSMutableString *remoteUrl = [NSMutableString stringWithFormat:@”http://127.0.0.1:8000/api/demos/?format=%@”, @”json”];
NSURLRequest *request = [NSURLRequest requestWithURL:[NSURL URLWithString:remoteUrl] ];
NSError *jsonError = nil;
NSHTTPURLResponse *jsonResponse = nil;NSData *response;
response = [NSURLConnection sendSynchronousRequest:request returningResponse:&jsonResponse error:&jsonError];
} while ([jsonError domain] == NSURLErrorDomain);if([jsonResponse statusCode] != 200) {
NSLog(@”%ld”, (long)[jsonResponse statusCode]);
} else {
NSLog(@”%@”, @”200 OK”);
}
NSError* error;
//demoJson was defined earlier near the top as a NSArray object
demoJson = [NSJSONSerialization
JSONObjectWithData:response
options:kNilOptions
error:&error];
}
}
We’ll have to ensure that the above method runs at the same time when the app begins to function. To accomplish this add the below line of code below viewDidLoad:
[self downloadData];
Next, we’ll updating the “numberOfRowsInSection” method. Here’s a code snippet that will make sure that the number of rows will match all the elements included in the demoJson array:
#warning method implementation is incomplete.
// Return the number of rows in the section.
return [demoJson count];
}
Update the cellForRowAtIndexPath method so it loads entries from our REST feed:
UITableViewCell *cell = [tableView dequeueReusableCellWithIdentifier:@”DemoCell” forIndexPath:indexPath];
if (cell == nil) {
cell = [[UITableViewCell alloc] initWithStyle:UITableViewCellStyleDefault reuseIdentifier:@”DemoCell”];
}
[cell.textLabel setText:[[demoJson objectAtIndex:indexPath.row] objectForKey:@”employee_name”] ];
[cell.detailTextLabel setText:[[demoJson objectAtIndex:indexPath.row] objectForKey:@”created”]];
return cell;
}
That’s it! We will have a functional mobile app ready that will help display the data that is retrieved from the REST API.
Conclusion: RESTful API is an excellent mechanism to fetch data from the server that is required for the functioning of a simple mobile app. Reading the post will make you familiar with the basics of the RESTful API and the process of creating an application that displays the data that you’ve obtained using the API.
Author Bio: Addison Cohen is an app developer working with Appsted Ltd, the leading mobile applications development services provider which delivers the most comprehensive mobile application solutions. He loves sharing latest information on mobile technologies like iOS, Android development processes.
- WCF Service Vs ASP.NET Web API
- Post JSON data to WCF RESTful Service
- Practical Guide to ASP.NET Web API
- WCF Hosting (Console | Windows Service | IIS | WAS)
- ASP.NET MVC3 Vs MVC4 Vs MVC5 Vs MVC6
- Understanding Model-First Approach in ASP.NET MVC with Entity Framework
- 3 Techniques for Instance Management in WCF
[su_list icon=”icon: arrow-right” icon_color=”#16A1E7″] [/su_list]
